Before I begin the description of a systematic approach to learning string figures beginning with the diamond system, I would like to show how I plan to instruct my granddaughter how to begin and what I wish to emphasize in my so doing. I would urge every new parent to consider what I try to explain about giving a young child intelligent fingers and hands.
the beginning for emma
and now the formal introduction to the system
osage two diamonds
I will discuss the method of making figures three ways in the beginning. First will be a pictorial approach. Second will be an explanatory text. Third will be videos of my hands making the figure. Feel free to use any of these three which best fits your mode of learning.
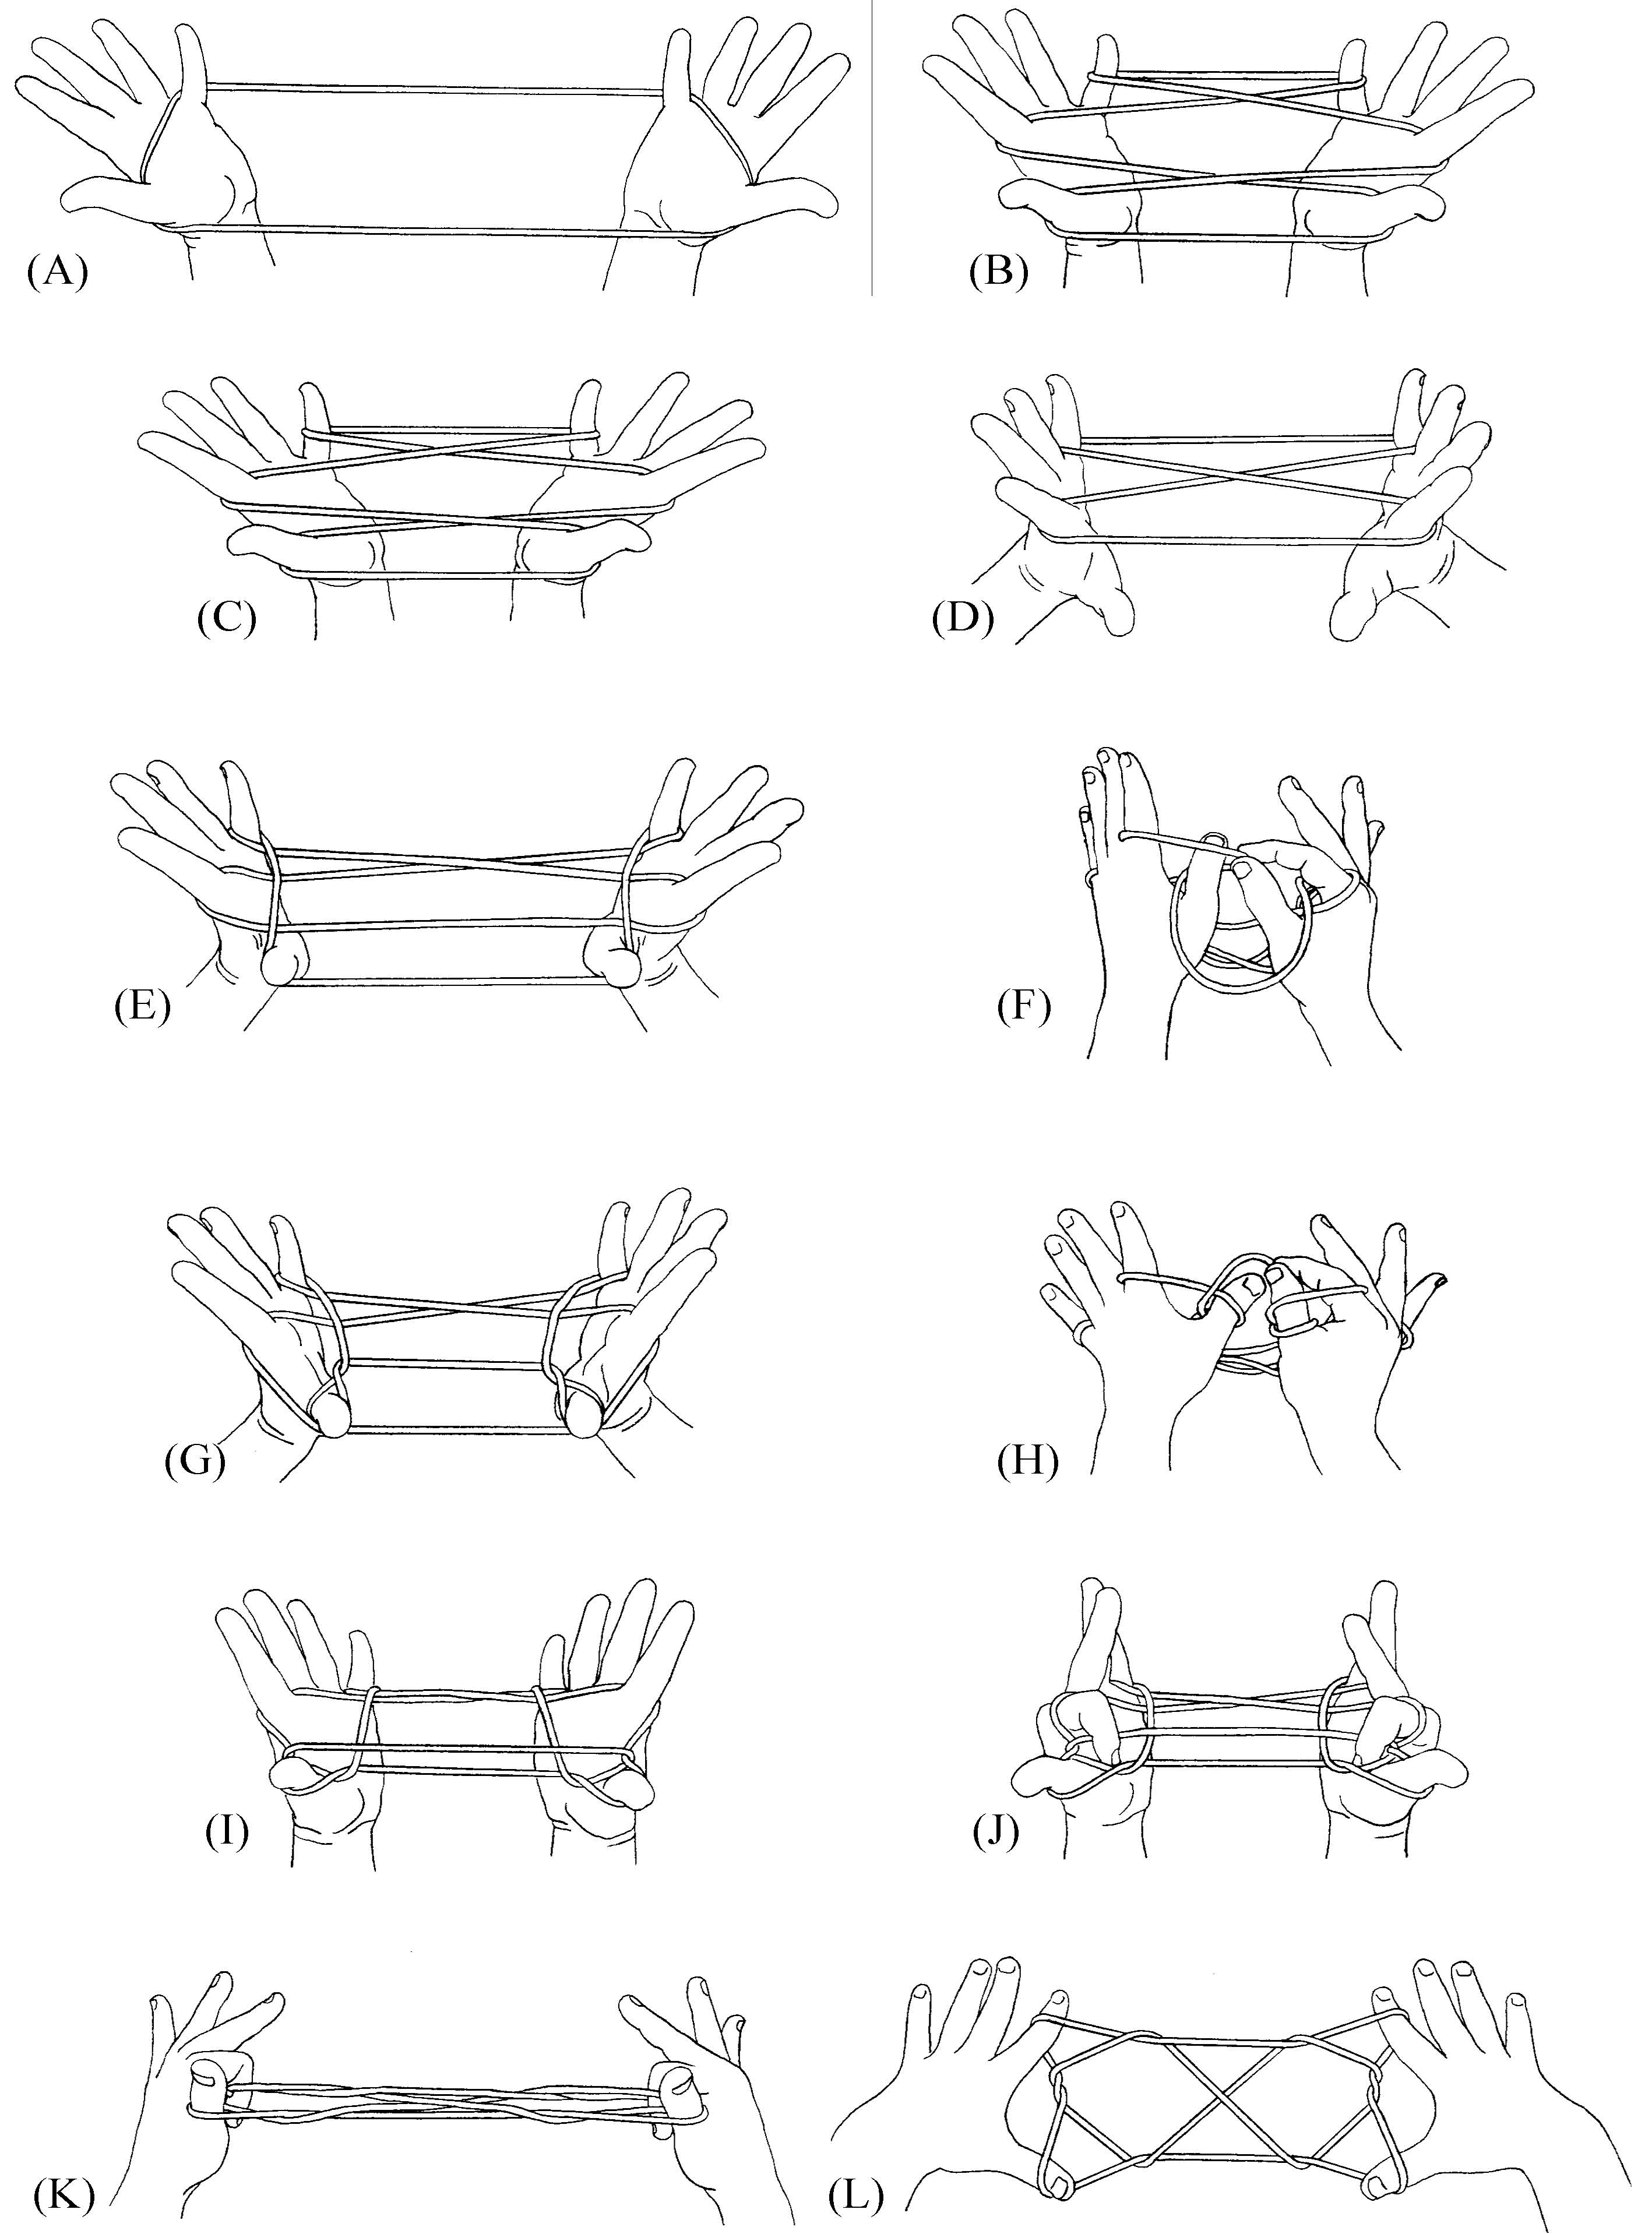
Fig. 1 -Stages in making Osage Two Diamonds: Loom Phase, Weaving Phase, and Extension Phase.
Loom phase
- Begin with Position 1 (fig. A), followed by Opening A (fig. B). Note that in Opening A, the left palmar string is retrieved first. If the right palmar string is taken up first, you have what is called Opening B (fig. C).
- Drop the loop from your thumbs and pull your hands apart to generate the basic two-loop loom (fig. D).
Weaving phase
- With your thumbs, reach away from you, over three strings, and pick up the fourth string (the far little finger string) from underneath. Return the thumbs to their starting position (fig. E).
Extension Phase
- Use the thumb and index of your right hand to pick up the segment of the left near index string that lies between the left index and the left palmar string. Drop it over the left thumb (fig. F), then repeat on the right and separate the hands (fig. G).
- With the help of the right hand, navaho the left thumb loops (lift the lower loop over the upper loop and release it, fig. H).
- With your left hand navaho the right thumb loops and extend (fig. I). This move is named after the Navaho Indians (the Diné people), who use it frequently in making string figures
- Turn the palms toward you and note the triangles formed between the thumbs and index fingers. On each hand, place the index finger into this triangle and press it against the palm (fig. J).
- Slide the loop off each little finger (use the right little finger to slide the loop off the left little finger and vice versa) and separate the hands to absorb the slack (fig. K). Note: The string concealed beneath your bent index finger will become the upper frame string of the design — don’t drop it.
- Rotate and open your hands away from you as if you were getting ready to catch a volleyball thrown shoulder-high. As you roll your hands, your thumbs will point toward you, then down, then toward each other; your index fingers will point away from you and then up as you straighten them.
- The result is Osage Two Diamonds (fig. L).
the first video is a simple showing of the figure being made from the viewpoint of the maker.
the next is a much younger me discussing osage two diamonds
the next is me at 75 discussing osage two diamonds
The video below actually discusses more than just the osage two diamonds, so the latter part of the video represents further explorations of the diamond system.

