creating 3-D figures
katilluik
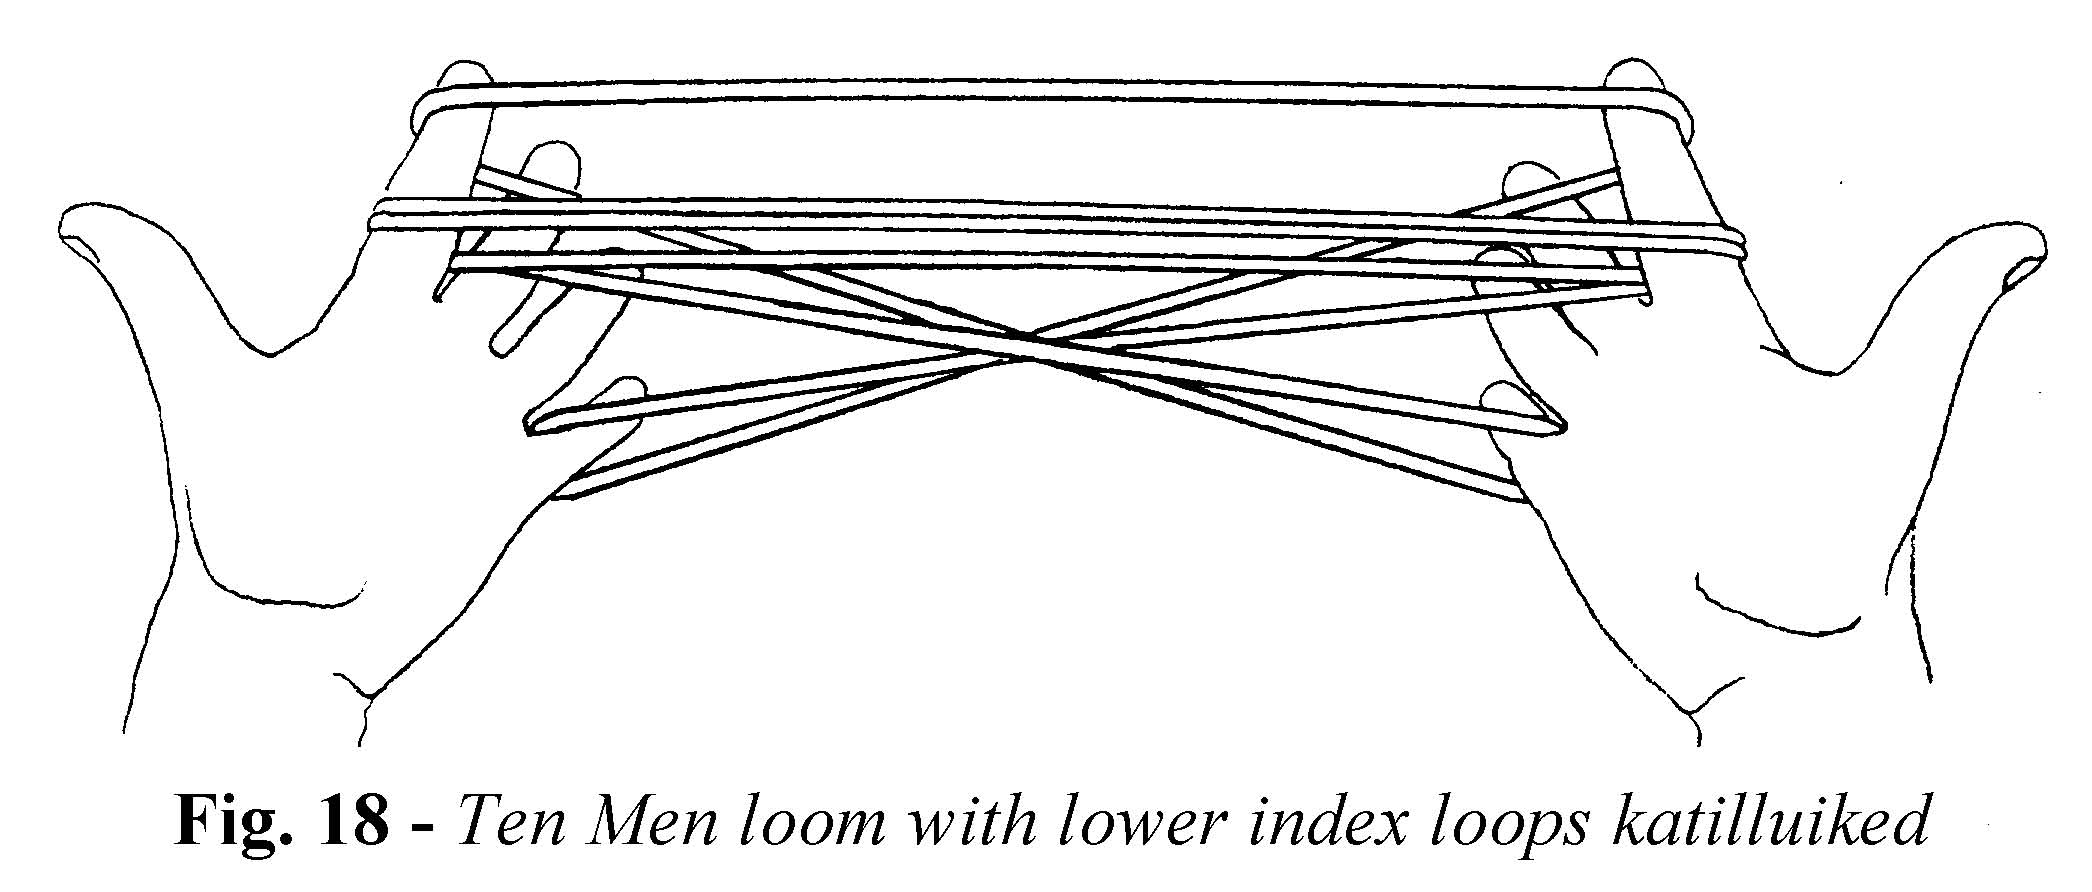
There is a fairly simple method of forming three-dimensional figures in the Ten Men system. The necessary preparation is merely to katilluik the bottom index loops after you have formed the loom and before you weave. Katilluik is an inuit word meaning to bring together, and it is accomplished (from the Ten Men loom position) as follows:
Transfer the upper index loop to the middle finger so you can work on the lower index loop.
Bring the hands together and slide the right index finger up through the left index finger loop and lift it entirely off the left index.
Re-insert the left index finger, from below, into both loops on the right index finger and slowly separate the hands. You should now have two loops on the index fingers with two near transverse strings (i.e. strings that run straight across the figure), one far transverse string, and one pair of non-transverse strings (i.e., strings that run into the figure and cross). This complex doubled loop is now the bottom index loop and is treated as a single loop when weaving.
Transfer the loop stored on the middle finger back to the top of the index finger. Make sure the transverse string is nearest you (i.e., don’t invert the loop during the transfers). See fig. 18.
There is, of course, no reason you should not katilluik the upper index loop as well to give a double katilluik loom. This will enrich the figure even more. A simple way to katilluik both index loops without transferring loops to and from the middle finger is as follows:
After forming the Ten Men loom, slide the right index up through the left upper index loop and lift it entirely off the left index
Re-insert the left index finger, from below, into both upper loops on the right index finger, and lift them entirely off.
Slide the right index up through all three loops on the left index (the single lower and the double upper) and lift them entirely off the left index.
Slide the left index up through all four loops on the right index (the double lower and double upper) and separate the hands.
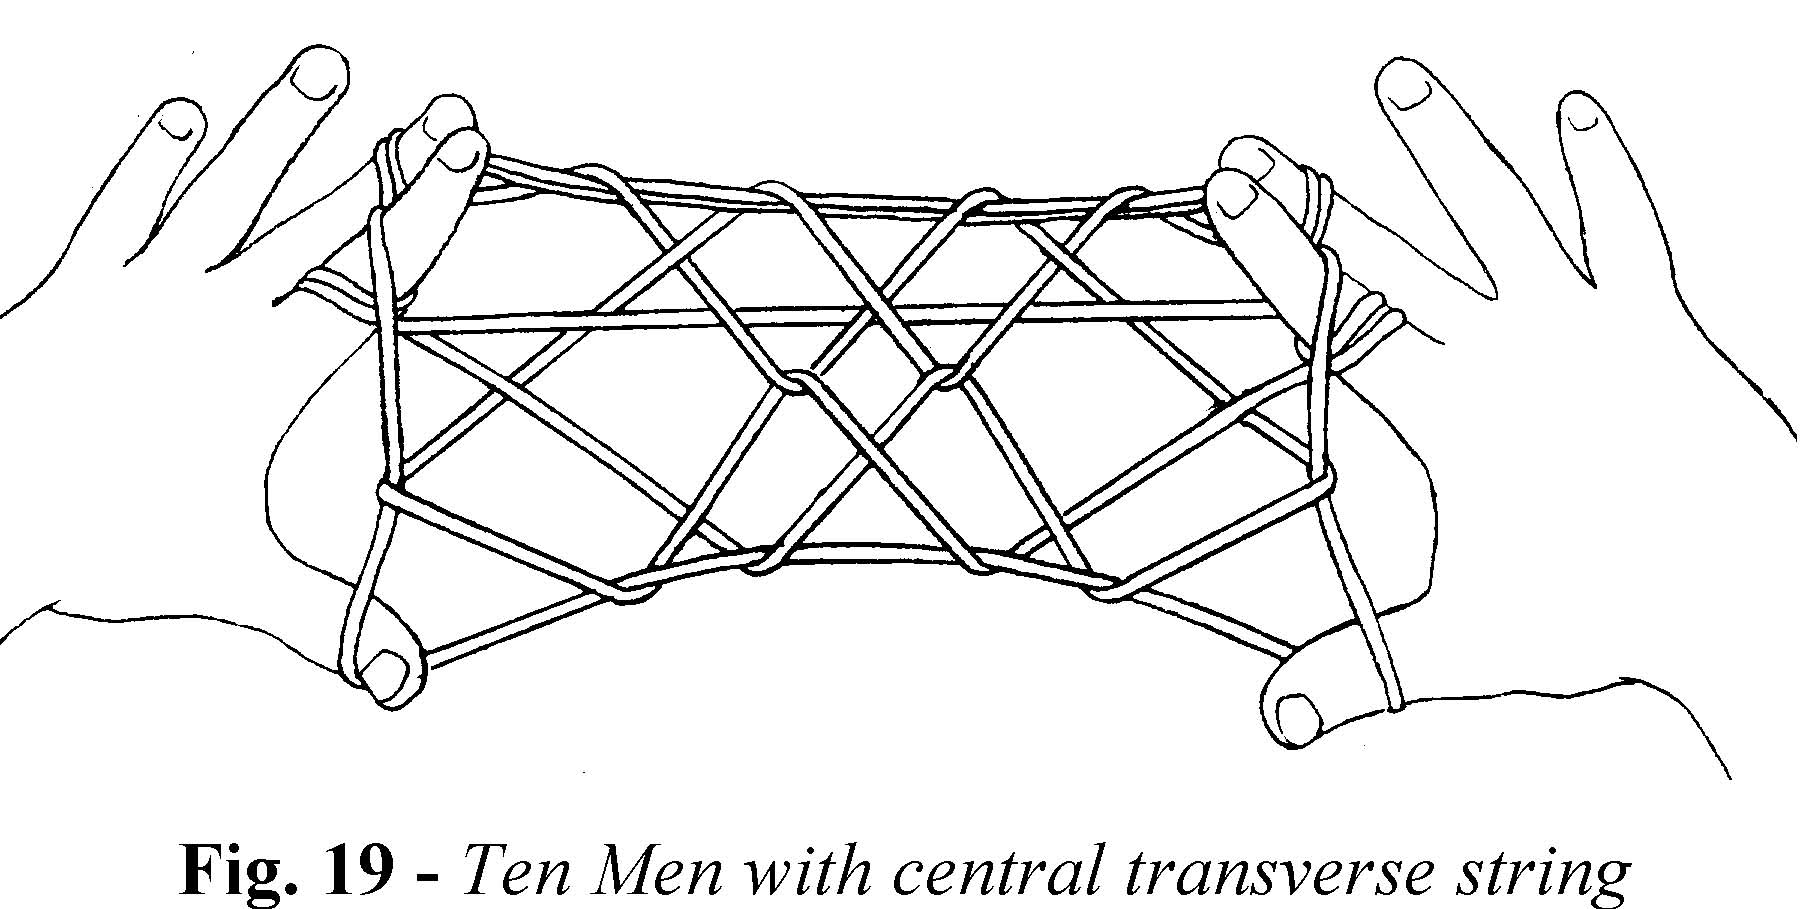
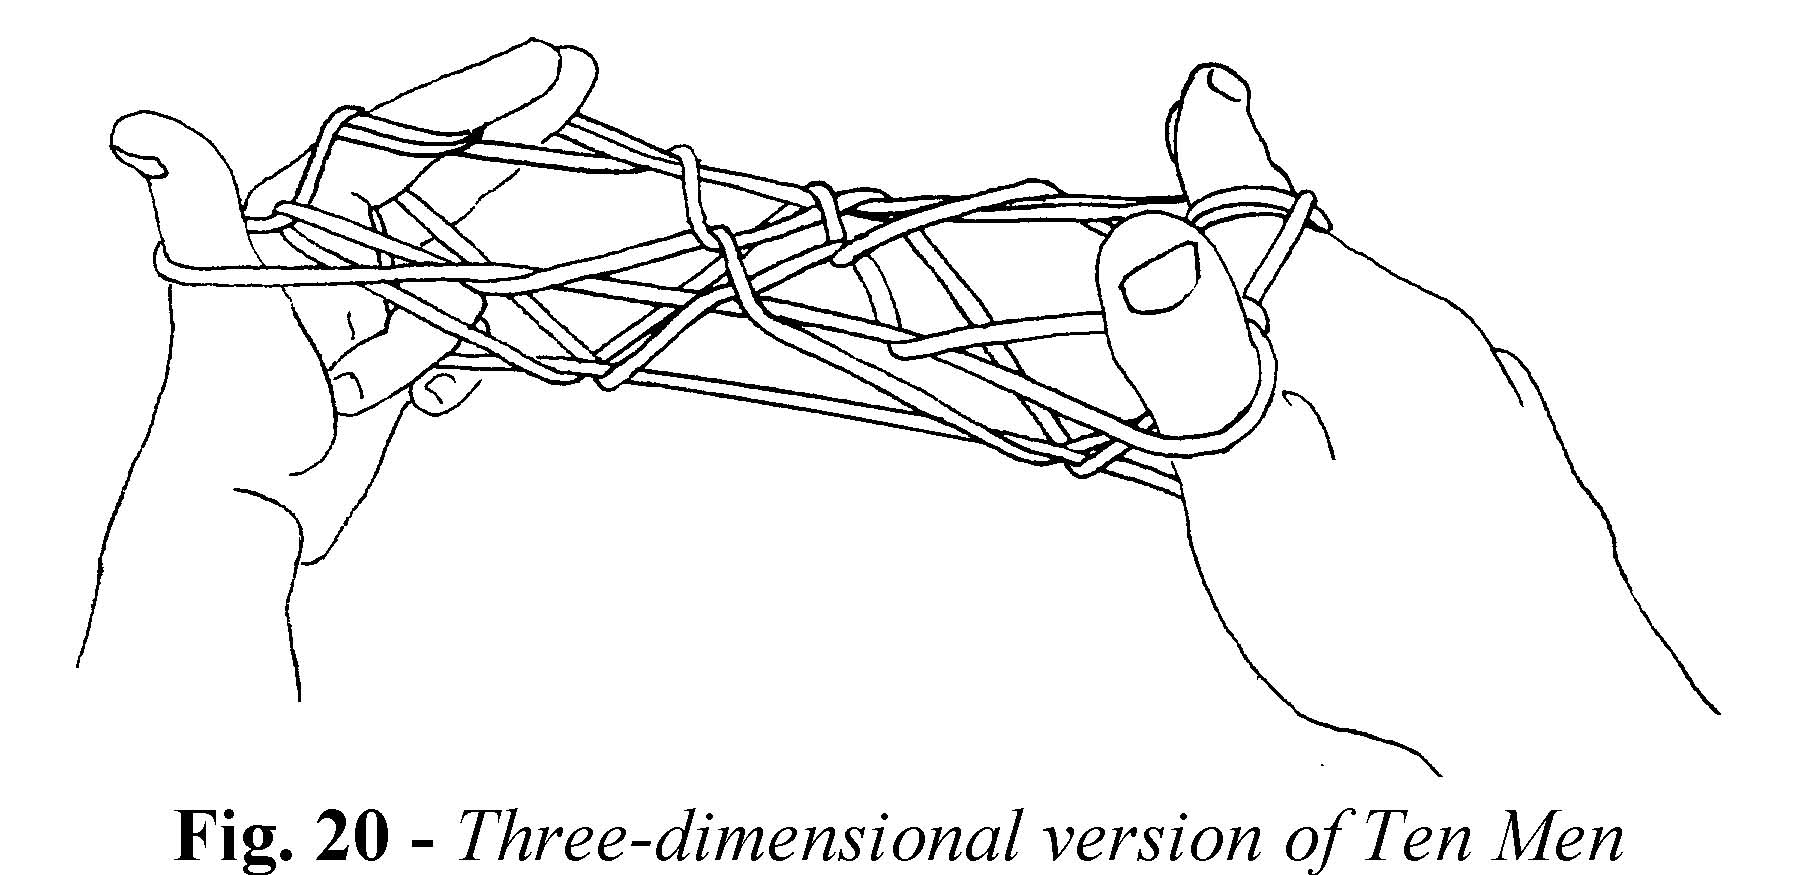
Figure 20 below shows the ten men figure with katilluiked lower index strings and the extra transverse string shown in figure 19 held down by the ring fingers to make a triangle of the thumbs, the ring fingers, and the index and middle fingers pinching the top transverse.
extended discussion of forming the 3-D ten men figure
ALTERING THE EXTENSION PHASE
Cleaning the Top
After displaying the figure with the standard Ten Men extension, gently withdraw each middle finger to restore the lower index loop, then release the little finger loop.
Pass each little finger toward you under all the strings, then hook down the near thumb string, closing it to the palm.
Release the thumb loop.
Transfer the upper index loop to the thumb, inserting the thumb from above (this inverts the transferred loop).
Transfer the remaining index loop to the thumb, inserting the thumb from below (no inversion).
Keep this transferred loop near the tip of the thumb.
Insert each index, from above, into the upper and lower thumb loops; catch the lower near thumb string on its back, drawing the string up through the upper thumb loop; then curl your index finger tip around the upper near thumb string (a transverse string), and draw this string through the loop already on your index finger by rotating the index finger away from you and up (the original index loop will slip off). If necessary you can pinch the transverse string between your index and middle finger if you have trouble curling your index finger around it.
Release both thumb loops and extend (indices pointing upward, little fingers touching the palms).
Now finish the figure by selecting one of the following three endings:
Power Lift
This move is shown in my diamonds dvd. Here’s how to apply it to the Ten Men figure after Cleaning the Top:
Transfer each index loop to the thumb, inserting the thumb from below.
Gently withdraw the little finger from its loop and reinsert it from the opposite side. The figure now lays flat between your hands.
With each thumb pick up the near little finger string.
Pass the index and middle fingers toward you over both strings of the upper thumb loop and pinch between them the lower near thumb string, then wrap the string around the tip of the index by rotating the pair away from you and up, lifting the string over the upper thumb loop as you straighten the index and middle fingers.
To expand the central design, separate the indices and little fingers as far as possible and push the thumbs toward the center of the figure (two ringlets tightly encircle each thumb). See fig. 23.
Two Diamonds Ending After Cleaning the Top
Straighten each little finger and bring it towards you, under the index loop.
Transfer the little finger loop to the thumb, inserting the thumb from below.
Transfer the index loop to the little finger, inserting the little finger from above (this inverts the loop).
Transfer the thumb loop to the index finger, inserting the index finger from below. The figure now lays flat between your hands.
With your thumbs, reach away from you, over three strings, and pick up the fourth string (the far little finger string) from underneath. Return the thumbs to their starting position.
Use the thumb and index of your right hand to pick up the segment of the left near index string that lies between the left index and the left palmar string. Drop it over the left thumb), then repeat on the right and separate the hands.
With the help of the right hand, navaho the left thumb loops (lift the lower loop over the upper loop and release it. With your left hand navaho the right thumb loops and extend. This move is named after the Navaho Indians (the Diné people), who use it frequently in making string figures.
Turn the palms toward you and note the triangles formed between the thumbs and index fingers.
On each hand, place the index finger into this triangle and press it against the palm.
Slide the loop off each little finger (use the right little finger to slide the loop off the left little finger and vice versa) and separate the hands to absorb the slack. Note: The string concealed beneath your bent index finger will become the upper frame string of the design — don’t drop it.
Rotate and open your hands away from you as if you were getting ready to catch a volleyball thrown shoulder-high. As you roll your hands, your thumbs will point toward you, then down, then toward each other; your index fingers will point away from you and then up as you straighten them.
extended discussion of alternate endings
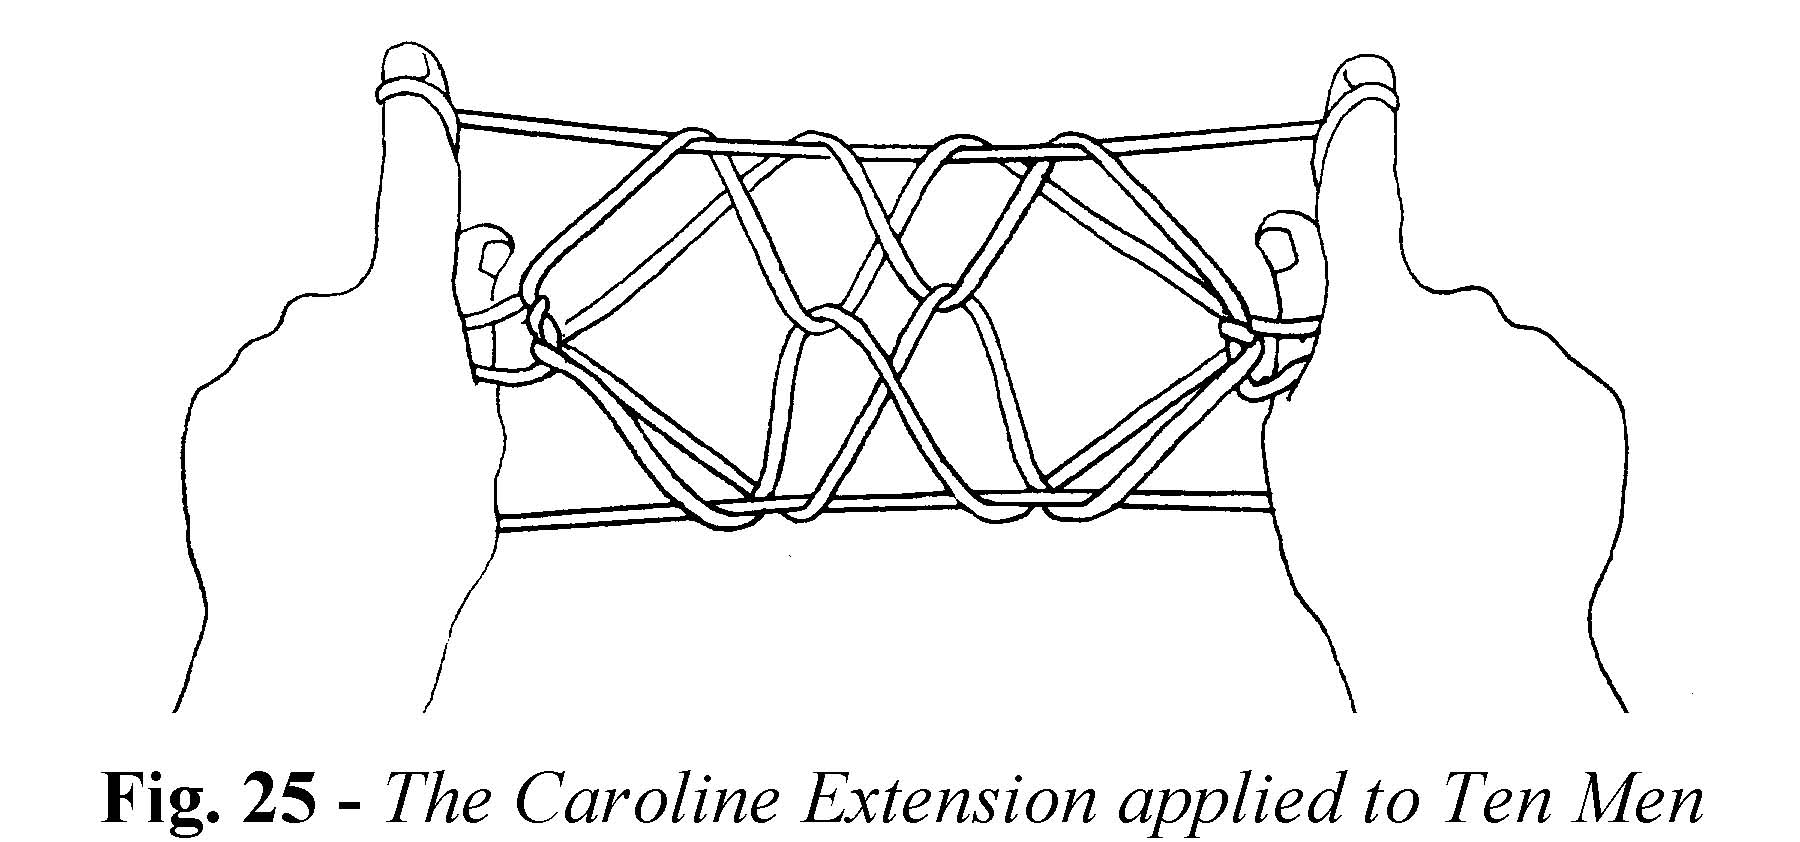
Caroline Extension
After Cleaning the Top, pass each thumb away from you, under the index loop, and pick up the near little finger string and the far index string;
Release the index loops. Gently release each little finger loop and reinsert the little finger from the opposite side.
With the tip of each index pick up the (lower) far thumb string, but as you return press the thumb against the first joint of your index finger to keep the string you just retrieved from slipping. Extend with palms facing away from you (fig. 25). (I note here that I cannot use the Caroline extension because of a football injury to my left wrist. I show it here because many people use it for these type figures)
For figures that are really difficult to display, try combining the Two Diamonds Ending with the Power Lift:
After completing the Two Diamonds Ending, transfer the thumb loop to the little finger by passing each little finger under the index loop, picking up the near thumb string, and releasing the thumb loop.
Transfer the index loop to the thumb, inserting the thumb from below. The figure now lays flat between your hands.
Finish by doing the last three moves of the Power Lift .
things to consider
you may have your own ideas about how to alter the loom to form new logic systems. you should try new things for yourself, but i caution you to make sure you take notes as you do so you will be able to recapture any new figure you find. with all these complexities it is easy to forget an essential detail and not be able to re-make a fantastic figure you discover for yourself.
when you wish to try new figures in a new logic system or using a new loom, you might wish to try somew of the advanced techniques i outline in the next lesson.


