So far we have recorded loop passages using written formulas. The formula for the first Inuit weave is:
• Little finger loop up through index loop and return
• Thumb loop over index loop, up through little finger loop and return
• Little finger loop down through index loop and return
Several years ago I devised a symbolic notation for recording the same information. Rows of circles represent loops, hence the name circle notation. Three circles in a row represent the three loops of Opening A or a 3-loop DNA loom, as specified. Arrows indicate the direction of various loop passages. Fractions placed below circles indicate the extent and direction of loop rotations (+1/2 = half turn away; –1/2 = half turn toward; +2/2 = full turn away; –2/2 = full turn toward). Brackets are grouping symbols.
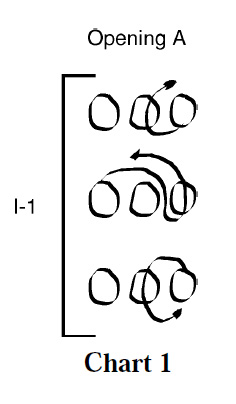
The first Inuit weave, rendered in circle notation, is shown in chart 1.
By convention, the circle on the left in each row always represents the loop nearest you, in this case, the thumb loop.
Here, the middle circle represents the index loop, and the circle on the right the little finger loop. The first line specifies which loom to use; in this case, Opening A.
The arrow in the first row of three circles tells the reader to pass the little finger loop up through the index loop and return it to the little finger. The exact method for doing this (manual versus refined method) is not specified (the reader is free to choose).
The arrow in the second row of circles tells the reader to pass the thumb loop over the index loop, pass it up through the little finger loop, and return it to the thumb.
The arrow in the last row of circles tells the reader to pass the little finger loop down through the index loop and return it to the little finger.
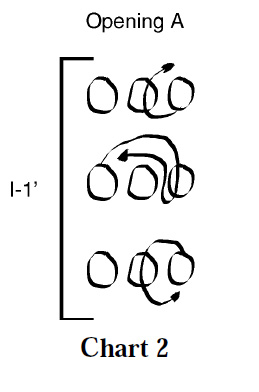
The first Inuit weave inverse (I-1′), rendered in circle notation, is shown in chart 2. Note that the only difference between chart 1 and chart 2 is the direction of the arrow in the second row of circles: In chart 1, the thumb loop passes up through the little finger loop, but in chart 2 the thumb loop passes down through the little finger loop.
Circle Notation for Cherokee Seven Stars
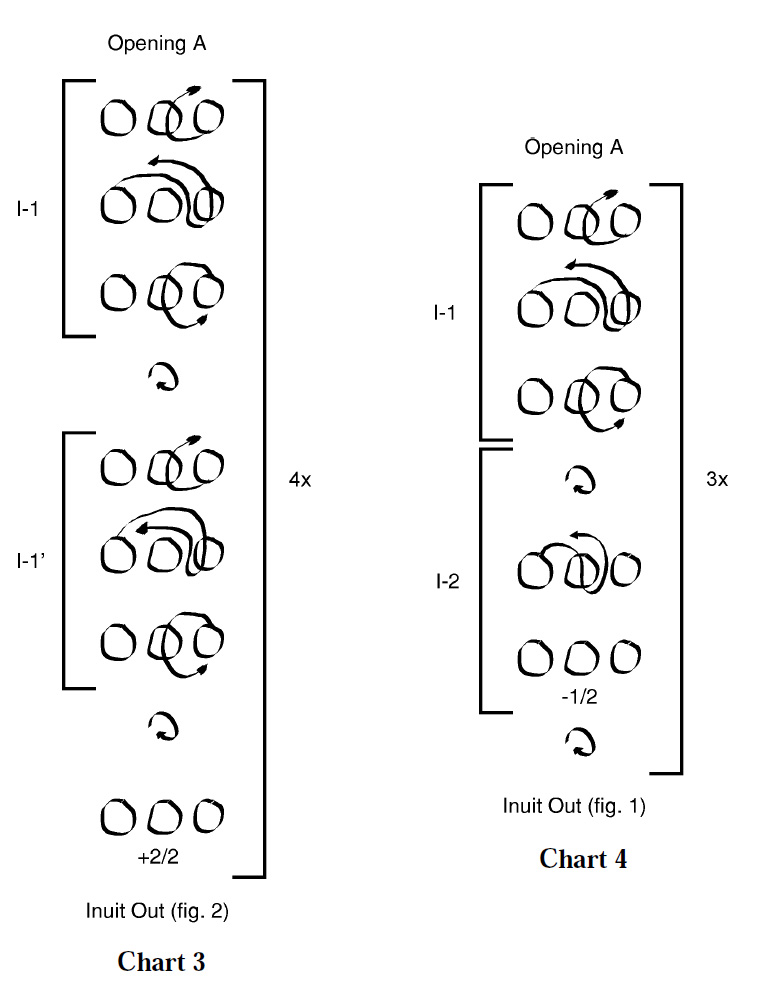
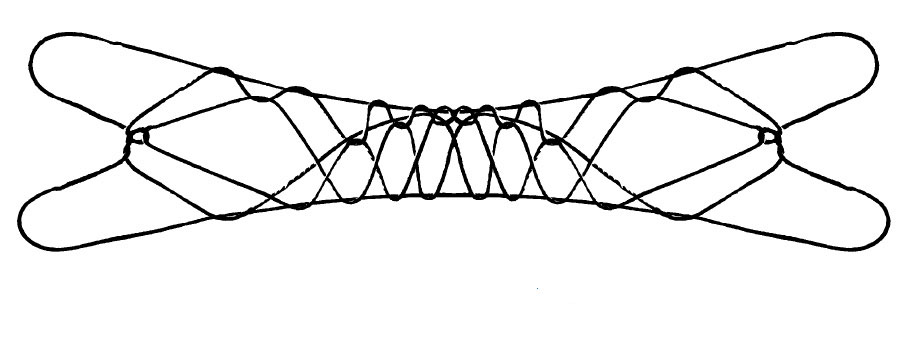
In the North American Indian net book I introduced an iterative figure called ‘Cherokee Seven Stars’. An illustration of it is reproduced below In this figure the first Inuit weave and its inverse are done four times. The inverse relationship is frustrated by rolling the entire figure after each weave. This complex figure is easily formed using loop passages, and the entire procedure is concisely summarized using my circle notation (chart 3):
A line-by-line translation for chart 3 might read:
• Line 1: Begin with Opening A
• Line 2: Little finger loop up through index loop and return.
• Line 3: Thumb loop over index loop, up through little finger loop and return.
• Line 4: Little finger loop down through index loop and return.
The bracket labeled I-1 is merely a grouping symbol to emphasize that lines 2-4 represent the first Inuit weave.
• Line 5: Roll the entire figure (see Chapter 1, Section 1 for this procedure). The circular arrow on line 5 always means “roll the entire figure +1/2 so that the underside can be manipulated.”
• Line 6: Little finger loop up through index loop and return.
• Line 7: Thumb loop over index loop, down through little finger loop and return.
• Line 8: Little finger loop down through index loop and return. The bracket labeled I-1′ is merely a grouping symbol to emphasize that lines 6-8 represent the first Inuit weave inverse.
• Line 9: Roll the entire figure.
• Line 10: Rotate index loop +2/2 (i do two consecutive +1/2 rolls.
Recall that a +1/2 roll is achieved by transferring the index loop to thumb, inserting thumb from below, then retransferring the loop to index, inserting the index from above).
Important: The large bracket labeled 4x indicates that the entire bracketed weaving sequence must be done four times before advancing to Line 11.
• Line 11: Inuit Out (make the Inuit Net from the beginning, as if you had Opening A on your hands). Extend using the Power Lift or Caroline Extension.
Since the method of extension is not specified in the chart, the reader is free to choose.
note the figure below was formed using an alternating color loop of string with six bands of color
Circle Notation for Inuit Bridge
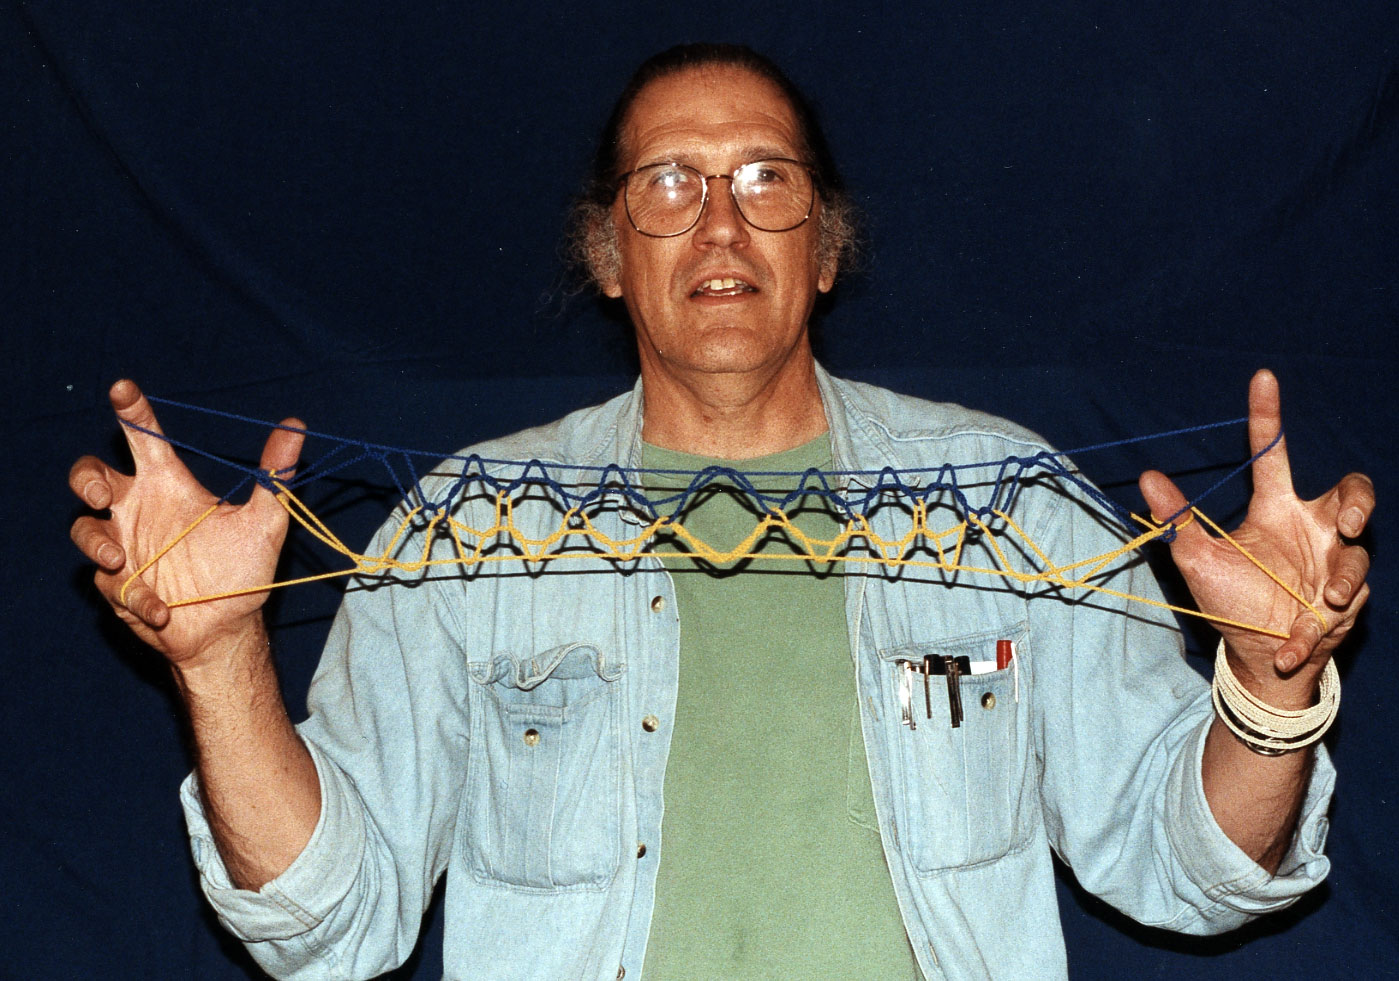
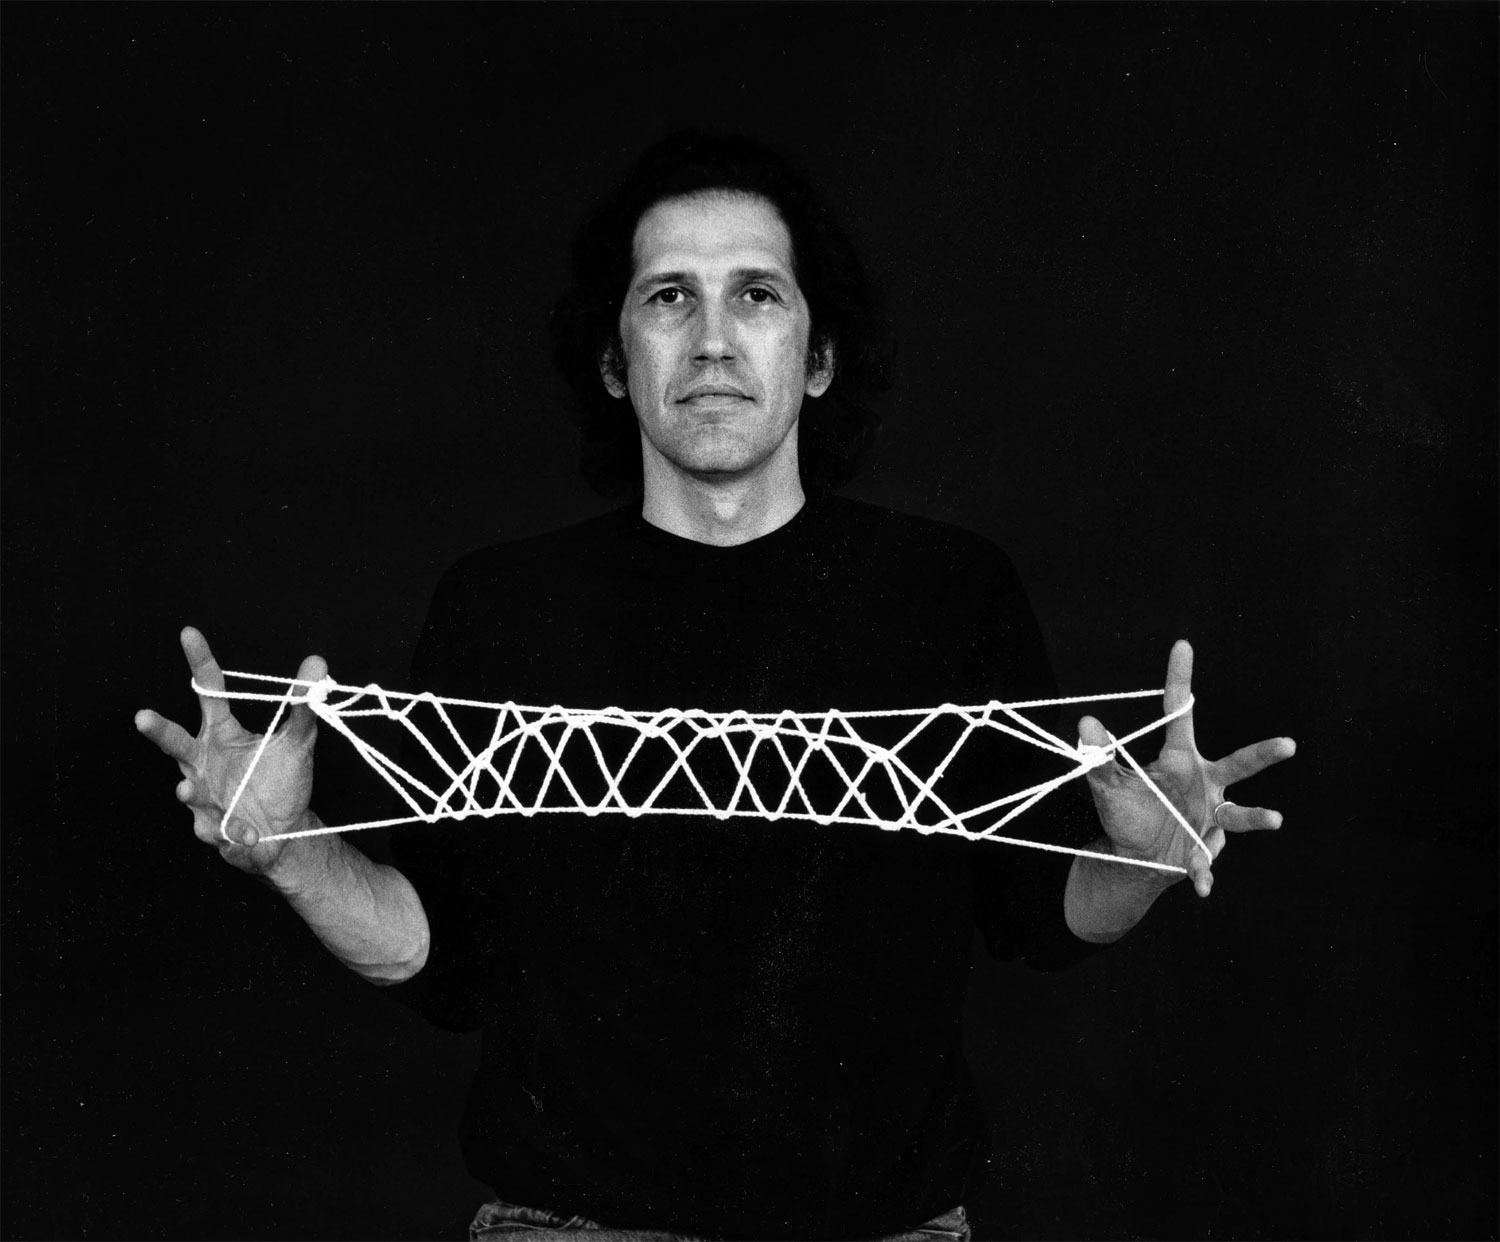
This figure can also be made using loop passages, as illustrated in chart 4:
A line-by-line translation for chart 4 might read:
• Line 1: Begin with Opening A.
• Line 2: Little finger loop up through index loop and return.
• Line 3: Thumb loop over index loop, up through little finger loop and return.
• Line 4: Little finger loop down through index loop and return.
The bracket labeled I-1 is merely a grouping symbol to emphasize that lines 2-4 represent the first Inuit weave.
• Line 5: Roll the entire figure.
• Line 6: Thumb loop down through index loop, then up between index and little finger loop, over index loop, and return.
• Line 7: Rotate index loop –1/2.
The bracket labeled I-2 is merely a grouping symbol to emphasize that lines 5-7 represent the second Inuit weave.
• Line 8: Roll the entire figure.
The large bracket labeled 3x indicates that the entire bracketed weaving sequence must be done three times.
• Line 9: Inuit Out . Extend using the Power Lift or Caroline Extension.

